Best Quad Monitor Arms for Standing Desks
- Lab tested
Like most reviews sites, our editorial staff and laboratory testing expenses are partially offset by earning small commissions (at no cost to you) when you purchase something through those links. Learn More

Finding The Best Quad-Display Monitor Arm
At WorkWhileWalking we’ve lab-tested many dozens of monitor arms over the years, of every flavor you can imagine. The reason there are so many monitor arm models out there is because of the tremendous variety of display weights, sizes, and combinations.
We understand it can be a bit daunting to find the right monitor arm for your needs. There’s a reason that monitor arms are the most frequently returned ergonomic accessories, and it starts with the fact that a lot of manufacturers and retailers leave out important details in their advertising. But don’t despair, we’re here to help! Doing a little bit of research up front can save you a lot of frustration down the road.
The content below was developed by our expert review staff to give consumers every bit of information needed to make the right choice in quad-display monitor arms from the outset. But you can skip directly to the review abstracts if you want to save time.
To compare all of the most popular monitor arms you can check out our comprehensive round-up of The Best Monitor Arm reviews. However, because there are so many arms in the market today we also broke this down to narrower round-ups just for Single Monitor Arms, Dual Monitor Arms, Triple Monitor Arms, 5-6 Monitor Arms, and 7-8 Monitor Arms. You are currently reading the round-up for quad-monitor arms.
Do You Need A Simple Monitor Mount or an Articulating Monitor Arm?
If you need to hoist four displays up to a proper ergonomic height, a quad-display monitor mount or quad-display articulating monitor arm is pretty straightforward to shop for.
But let’s talk for a moment just about the difference between a “monitor mount” and an “ergonomic monitor arm” (a.k.a. “articulating monitor arm”). That’s a bit tricky to understand sometimes because some manufacturers use these two labels interchangeably, when they really shouldn’t. Maybe it doesn’t rise to the level of false advertising, but it definitely confuses consumers. So let’s set the record straight.
A monitor mount is the simplest and least expensive way to go when you’re going to be the only user working on that computer, at a non-adjustable, fixed-height desk. But if multiple people of varying anthropometry share the same desk, or if the desk is an adjustable-height, sit-to-stand type (even when used by just one individual), you’re definitely going to want to opt instead for an articulating monitor arm.
Because our audience is either using an active workstation already, or is in the research phase of planning to adopt a sit-stand desk or treadmill desk, we don’t review non-articulating monitor mounts. Our focus is on the articulating ergonomic monitor arms that are much more popular these days, and future-proof. Yes, they cost more than simple monitor mounts, but they make it easy to move the monitor up or down to the correct height in a matter of seconds.
If a standard quad-display monitor mount is what you’re looking for we can set you free here to go shop for one on Amazon; they’ll generally run you around $100.
So let’s get into the nitty gritty on how to find the best quad-display monitor arm. For most users, the important shopping criteria for most users will be:
- Does it have the right weight range to accommodate the weight of my monitor?
- Is it compatible with the sizes of monitors you have?
- Does it have the right height-adjustment range to accommodate my needs both when sitting and standing, given where the VESA mount is located on the back of my display (see our measurement guide below).
- Is the mounting bracket compatible with my desk?
- Can I get it in the color I desire?
- Is it reliable enough, and does it have a decent enough warranty, for the price I’m willing to pay?
Types of Quad-Monitor Arms or Multiple Independent Arms In Concert
If you are looking to mount four or more displays you’ll need to look for the rare monitor arm that can handle that many screens. Some of these attach all screens on a single crossbar for an ultra wide view, three screens on a crossbar with one above/below, four individual articulating arms attached to a central hub that can even put two over two, or go with one of the options below:
- Option 1: Use a combination of single, dual, or triple arms to accomplish the job.
- Option 2: Search for a high-end commercial monitor arm that can support 4 to 6 monitors; just be prepared for the sticker shock and a big installation task; these are highly specialized products generally sold to the “console” market.
- Option 3: Move up to a more versatile and powerful electric monitor arm such as the iMovR Emma, which can handle up to 6 displays at once.
However, even if you have four monitors, there are scenarios in which using multiple single-display arms might be a better solution for you.
Perhaps the simplest example of this is when you’re adding a fourth monitor to your workstation but don’t want to throw away that perfectly good triple-display arm you already own; you can always just add another single-arm to hold up your fourth display.
If you have heavier or larger monitors that won’t work within the constraints of a multiple-monitor arm, having two, three or even four single-display arms can sometimes meet your needs better. Especially if you are wanting to turn one or more of them to vertical alignment and back depending on your work.
However, if you want to have any screens on top of one another, you’ll have to upgrade to a more versatile and powerful arm, whether it is one screen above three, two over two, or even three over one.
The primary downside to having multiple screens on multiple independent arms is that you have to adjust each one of them separately whenever you move between sitting and standing. That can be a bit cumbersome if you have to switch and realign them each time, multiple times throughout the day. A secondary downside is that it’s probably a little more expensive to go this way versus buying a multiple-display monitor arm.
Beware of Monitor Arms That “Arc”
The vast majority of single-display monitor arms and some duals, triples, or more have an inherent arcing motion when they’re constrained against a wall behind your desk. That means every time you go to raise your monitor it will shift a little to the left or right, placing them off-center from your keyboard and mouse.
To avoid this, you’ll need to either move your desk at least 8” away from the wall to allow the elbow of the arm to stick straight back, or you’ll need to upgrade to one of the rare monitor arms that can move perfectly vertically with no arcing. Of course you can always settle for just moving your keyboard and mouse over a half step every time you shift from sitting to standing, if you don’t have a keyboard tray, office treadmill or any other accessory forcing your center position to be fixed.
Because of the arcing issue, if you plan to use arms with elbows that bend back from the edge of the desk, you will definitely need to have at least 8” of clearance behind your desk if it is adjustable-height, or if multiple users share the same desk. The only alternative when you do have a wall behind your desk would be to go with an electric monitor arm that can move all the displays straight up and down together with just a tap on the paddle.
Monitor Arms Are Absolutely Essential, And Here’s Why:
If you’re already convinced you need a monitor arm you can skip to the next section. If not, read on to learn why this really isn’t an optional accessory for anyone who spends significant time at a computer each day. Especially if you work at a sit-to-stand desk.
Working with a monitor that’s positioned too low while standing can cause users to slouch forward, cascading into neck, shoulder and back pain, and a host of other problems in the long run. In the vast majority of cases of poor ergonomic setups, people are found to be craning their necks forward and glancing downward, most often to look at a laptop display. You can read about the occurrence of poor monitor setups in this study by the University of Cincinnati Ergonomics Department. This is why external displays mounted to articulating, ergonomic monitor arms are essential for all standing desk users.
The biomechanics are pretty easy to understand. For every inch that your 12 lb head is leaning forward or backward to look at the screen, your neck muscles need to support an extra 10 lbs of weight. So craning down to look at a laptop screen with your head tilted forward 2 inches means your neck muscles are being recruited to support 32 lbs of weight—often for hours on end.
When it comes to standing desk ergonomics the problem is exacerbated by something even many certified ergonomics were never trained to identify or correct. To understand this clearly, just compare side-view x-ray images of the human skeleton when someone changes position from sitting to standing. Because our spines bend 90º at the bottom when we’re seated, our spines stretch out when we stand, making the relative distance between the keyboard and the appropriate monitor height (to avoid neck strain) greater. The taller the individual the bigger this height difference becomes.
Long-term, so-called computer hunch posture can lead to an array of painful maladies that can reduce quality of life, send someone into years of chiropractic treatments, physical therapy, medications, and even surgeries, so this is not something to be dismissive about—whether we’re talking about your own body or your co-workers’. Even in a seated posture, prolonged forward-leaning to view a laptop screen can lead to all of the chronic issues you see in this illustration.
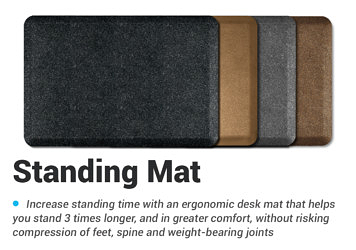
The least expensive and first go-to solution is to add an external display and install it on an ergonomic monitor arm, which is the focus of this article. (The other two key weapons in this battle are ergonomic keyboard trays and ergonomic chairs. For standing desk users there’s a fourth, the all-too-critical anti-fatigue standing mat.)
Narrowing Down The Many Choices In Quad-Display Monitor Arms
It may seem daunting. After all, there are literally hundreds of quad-screen monitor arm models on the market—pages after pages of models on Amazon alone! Nearly one million monitor mounts are sold each year in the US—it’s a gigantic market with a gigantic range of options.
In the broader category of ergonomic accessories, monitor arms are the most likely items to get returned for refund or replacement, usually because consumers didn’t check the specs and their own equipment sufficiently before placing the order, or the seller didn’t take enough care in disclosing the specs and limitations of their product. Between all the different monitor styles out there, variations in standing desk designs and variations in users’ anthropometry, it can be tricky to buy the right arm(s) to fit all three of those criteria.
This is one example where you might want to buy directly from a reputable online ergonomics dealer or manufacturer rather than on a marketplace where no expertise is proffered in selecting the right one for you. It is also one of those categories in which user reviews, even verified ones, cannot be relied upon—not just because of the propensity for fake reviews on sites like Amazon, but the fact that everyone’s computer equipment and anthropometry is completely different. What worked for one user may not work well at all for you.
A Step-By-Step Guide to Selecting a Monitor Arm
A little due diligence upfront to narrow down your choices will go a long way toward eliminating the frustration many users run into when the monitor mount they ordered doesn’t work with their display(s). We’re here to help! This primer will help you figure out your own criteria for what kind of display mount you’ll need, and our review abstracts below will lead you to our lab-tested reviews of the most popular arms on the market today. Let’s get started!
Step 1: Get all the specs on your monitor(s)
These are actually easy to do with a simple Google search, or you can look up the specs on the manufacturer’s website. You’ll want to get the height and width (less critical if using single-monitor arms) of each monitor along with its weight. Do not be confused by the diagonal width, which is sometimes still used by computer display marketers, and is still the standard for TV sets. Especially if you’re going to mount multiple displays on an arm, you need to know whether it can handle the height and width of your monitors; the diagonal dimension does not factor at all into compatibility.
It’s also a good idea, especially with some of the very large monitors available on the market today, to check that the VESA mount is compatible with the one on the monitor arm you’re considering. If not, you might need to do something special to accommodate it, like removing the stand or adding a VESA adapter (iMacs are classic in this regard). 99% of monitor arms these days can handle a 75mm or 100mm VESA style. If you have a truly gigantic monitor with a 200mm VESA pattern, you’ll probably need to use an adapter plate, but chances are it’ll be too heavy for mounting to a conventional mechanical monitor arm in that case (you’ll likely need to move up to a heavy duty electric monitor arm).
Another consideration with heavy monitor setups is the compatibility with the materials of the tabletop itself. With weaker materials on low quality desktops there is a danger of warping and weakening the wood, possibly cracking it completely after repeated bumps and shakes over time. To help prevent that, you could install a heavy-duty reinforcement plate that will help stabilize the connection of the monitor arms to the desktop. iMovR makes a quality steel reinforcement plate for mounting heavy duty monitor arms that will do exactly that.
Step 2: 99.99% of ergonomic monitor arms use a VESA mount
The VESA mount you’ll find on most ergonomic display mounts is a square plate with four holes spaced 75mm from each other and another four holes spaced 100mm from each other. There are some oddball ones out there with 50mm, 90mm and even 200mm hole patterns, but in all likelihood with today’s popular LCD monitors, you’re going to use the 75mm pattern for smaller displays and 100mm for larger displays. So make sure you know which hole patterns are drilled into the back of your monitor(s) and that the arm you select will have a VESA plate that is compatible.
A couple of important details to note:
-
For iMac computers, you will need to purchase a VESA adapter bracket, either from Apple or from one of the many alternative options on Amazon. We recommend getting one that allows you to remove the built-in stand as this is extra weight that you don’t want to saddle the monitor arm with, and is also a much more elegant solution. While the stand looks permanently attached, it actually removes pretty easily. Check here for more information about mounting your iMac on a monitor arm.
- Cheaper arms are slightly difficult to install without the help of someone to hold up the display while you drive four screws into the VESA plate. Premium arms come with a simple quick connect adapter that you first attach to the back of the LCD display while it’s lying flat on a desk, in 30 seconds. Then the entire monitor “slips over” the VESA plate. This $1 part makes a huge difference in installation ease. Just note that there are a few LCD models that have a recessed square in the back of the display that the VESA plate sets into; in that case, you won’t be able to use the quick connect adaptor—just toss the plastic piece and get a friend to hold up your monitor while you screw it onto the VESA plate old school. As a caveat to all of this, if you’re looking to absolutely maximize rigidity in your monitor arm system (e.g. for treadmill desk users) toss the quick-connect adapter and bold your monitor directly to the VESA plate.
Step 3: Determine the Required Dynamic Height Adjustment Range of Your Monitor Arm
There’s a simple equation you can use to determine whether or not a given monitor arm will work for you, or whether you’re too tall for it. You’ll need to know the following:
A—the maximum height of your monitor arm
B—half the height of your monitor—because the mounting plate is generally located in the center of the monitor, half of the monitor will stick up higher than the plate. (Note a lot of the newer monitors on the market do NOT have the VESA mounting holes in the center, so be sure to measure your specific monitor.
C—your eye height at the zero-degree sight line (i.e. the distance from the floor to your eyes while standing looking straight ahead)
D—the height of your standing desk while you are standing
If A+B ≥ C-D, then you can use the monitor arm without having to crane your neck down or strain your optic nerve. (Note: while not ideal, even if you exceed this limit by a couple of inches you might be ok—and you’ll certainly be better off with a monitor arm than without one—just try and make sure your application windows are always high up within the display area.)
This formula works for standing desk converters as well; you’d just have to use the height of your converter for D. Most X-lift and Z-lift standing desk converters add about 6″, so you’ll want to look for a “short pole” monitor arm specifically designed for use with converters (example). These smaller arms are also lighter, which is important given the limited weight capacity of these non-electric desk converters.
Step 4: Determining the Arm Extension Reach and Arm Retraction Depth
This is one of the most commonly neglected specs that users find out too late that they should have checked out in advance. The arm extension reach is the maximum distance the monitor can be moved toward the user, or aside when wanting to show a co-worker or client your screen. If you collaborate a lot with others, or sometimes share a display with a deskmate to your right or left, this is an important spec to consider.
If you plan to use your monitor arm on a corner desk or L-desk and mount it near the “corner” then it is also a very important spec. While some corner desks have a chamfered back edge so that monitor arms with a normal extension reach can be used, if your L-desk doesn’t have this feature you’ll want to find an arm that’ll allow your monitor to reach forward far enough so that your focal depth is correct. Typically this is approximately the length of your arm reaching out to the top of the screen. But it could be greater if your display is particularly large.
Arm retraction is a measure of how far forward of the back edge of your desk your monitors will sit when pushed all the way back. On most arms, this is about 4″ – 5″ assuming an edge-clamped mounting. However, some dual monitor arms with crossbars can be as much as 8.5″ off the back edge. If your desktop is a capacious 36″-deep that might be perfect, and it may still be workable on a standard 30″-deep standing desk if your monitors aren’t super-large or you have a keyboard tray that lets you stand back an extra foot or so from the desk, but you would never want to use this kind of arm on a “compact” 24″-deep desk.
Of course, the other workaround for depth-of-field is to mount the arm in a custom-drilled grommet hole instead of using the edge clamp. Premium monitor arms from Ergotron, iMovR (check out our roundup of all the iMovR monitor arms) and others always include hardware for both in the box, but be careful when ordering cheap monitor arms to check that they are grommet-mount, edge-clamp mount or contain both sets of hardware. Also make sure they are “articulating,” and not just fixed-height arms that won’t do you any good on a sit-to-stand workstation. Speaking of grommets, check out our article on grommet holes, with everything you need to know about the different ways to use them to enhance your workstation, what to look for in your grommet holes, and where to find the desks with the best ones.
Step 5: Putting It All Together
With your parameters in hand, it’s just a matter of narrowing the options.
- Make sure the weight capacity of the arm is greater than the weight of the monitor itself. If you’re going to be removing a stand as part of adding the display to a VESA clamp then you can subtract the weight of the stand. If you have two or more monitors, then make sure the combined weight of the displays is still within the performance specs of the arm.
- Check that the top of the dynamic height adjustment range of the arm is high enough for your monitor (Step 4 above).
- If mounting two or more arms on a single mount, make sure the width of each monitor is within the specified range the arm was designed for.
- Check that arm extension and arm retraction specs will work well with your desktop depth and usage profile.
- Check all the special considerations below to see if any of these situations apply to you.
- If you can, confirm your decision with an expert, like one of our ergonomic experts at WorkWhileWalking (reach us on live chat, bottom right corner of your screen).
Special Considerations
- See our primer on the difference between air cylinder and compression spring counterbalance mechanisms in monitor arms to decide whether this is an important criterion for you. While gas-piston arms are definitely smoother and easier to move, low-quality ones can lose their lift capacity prematurely and start to sag. Look for ones with 10-15 year warranties. As a general rule of thumb, in fact, we would steer consumers away from any commodity monitor mount that comes with less than 10 years of coverage. With a stand-up desk, these arms will get a workout several times a day, go for quality.
- A distinct disadvantage of most monitor arm designs, because they were fundamentally created decades ago for users who would only sit at a fixed-height desk, is that there is an arcing motion to their counterbalance mechanisms. This means that even though you can set the edge clamp so that the monitors are centered on your desktop, as soon as you change position between sitting and standing the center will likely shift a couple of inches left or right. This is an annoying consequence of yesteryear designs that we have vociferously complained about to all the major monitor arm manufacturers for the past decade, to little avail. At WorkWhileWalking we’re hypersensitive to this issue because office treadmills are hard to move, and making the user crane their necks left or right a couple of inches kind of sucks. The workaround? Buy a larger display and move your working application windows to the center as much as possible.
- While many arm manufacturers seeking to catch the new wave of millions of standing desk buyers have increased the height of their poles, they haven’t done anything to address this arcing motion. So you may find that you need to compromise the position of the edge clamp to get to a middling of the center position.
- Unless you have room behind your desk. If not blocked by a wall or the backside of a co-worker’s desk, you can solve this problem by sticking the elbow of your monitor arm straight back. Then the arms motion will be straight up and down with no arcing.
- New electric monitor arms coming out in 2021 generally move straight up and down, eliminating this problem completely.
- Make sure the edge clamp can handle the thickness of your desk and can work around any metal components under the desktop, such as crossbars and other frame members that might get in the way. A classic example is Vari standing desk converters that have a metal frame member not far from the back edge of the work surface that prevent all but specially-made Vari monitor arms to be installed.
- Treadmill desk users will want to shy away from arms that are too shaky and stick with ones that either have stiff joints or have hex key adjustments for tightening them. On any two-legged desk, it is unavoidable to have some oscillation induced into the desk by the user’s swaying walking motions, and you’ll want to minimize the amplification of those oscillations in your displays as transmitted through the monitor arms.
- Understand that with most desktops the position of the edge clamp is essential to hone in on before really tightening down in place. We’ve seen a lot of desktops after years of having an edge-mounted monitor arm attached in the same spot, and there’s often a slight depression in the wood or laminate from where it used to be, or worse, discoloration in the desktop from the protective rubber pad that comes with most monitor arms (ironically to protect the desktop from indentations). Note that neither the monitor arm manufacturer’s or desk manufacturer’s warranty is likely to cover any damage of this nature.
Best Quad Monitor Arms for Standing Desks
1. iMovR EMMA Electric Monitor Arm
Truly a groundbreaking development in the arena of ergonomic monitor arms, the new EMMA Electric Multi-Monitor Arm is the most exciting thing we’ve gotten to lab test in a while. And we got to really put it through its paces with a crazy number of potential configurations of displays (up to six, flat or curved, landscape or portrait, and up to 75 lbs each or 150 lbs in total) and laptop mounts. The ability to keep each monitor at the same focal depth is also going to be a game changer for people who really need to be able to focus on all their entire screen area without lag time or eye strain (e.g. day traders, gamers). The bluetooth-enabled controller has promising future app features that we look forward to seeing. While definitely a pricey option compared to mechanical counterbalance arms, there are things those conventional arms simply cannot do nearly as elegantly and swiftly as the EMMA. Exceptionally well prepared installation videos and documentation make assembly a relative breeze compared to other, far more expensive solutions that we’ve seen in the “console” industry (not items you can buy through e-commerce). 100-day satisfaction guarantee and 5-year warranty reflect the quality and reliability of the componentry.
Price: $880
2. Innovative Office Products Bild Monitor Arm
The Bild monitor mount was a great concept that IOP just couldn’t pull off with its usual success. At the end of the day it’s an expensive way to mount a large number of monitors with no height adjustment possible, making it a “monitor mount,” not an “ergonomic monitor arm.” Unless you need more than 6 monitors there are better solutions out there for a lot less money.
Price: $454
3. iMovR Under-Desk Steel Reinforcement Plate
Modern-day monitors like 49″ panoramic displays and other large and heavy screens are awesome, but when it comes to mounting them ergonomically on a sit-stand workstation (much less a treadmill desk workstation), continuous vibrations and accidental bumps into the desk can weaken the desktop itself over time and result in a nasty crash as the edge clamp of your heavy duty monitor arm snaps the back edge of your desktop off like a KitKat bar. While iMovR uses extremely strong desktops in their own standing desks, they also make an assortment of heavy duty monitor arms that they know customers will be installing on non-iMovR desks with cheaper MDF or particleboard desktops that could at least flex quite a bit under the load of a heavy monitor array, if not break altogether after the prolonged stress. So, they designed this seemingly simple 1/4″-thick steel reinforcement plate that can be installed underneath the desktop where the monitor arm edge clamps to the desk. And the verdict? The iMovR Under-Desk Steel Reinforcement Plate works as advertised.
Price: $120
Completing Your Ergonomic Workstation
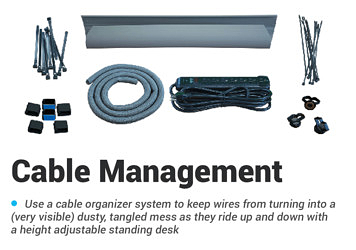
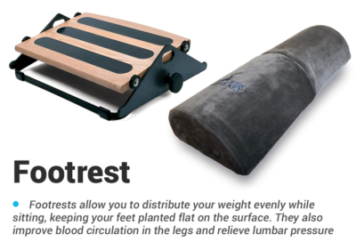
Acquiring the best standing desk for your decor, budget and performance requirements is Step One. But making it a true ergonomic workstation involves adding the appropriate accessories you’ll need to keep your body in a correct posture, and have a neat and tidy setup. Check out our comprehensive guides to monitor arms, keyboard trays, anti-fatigue mats, ergonomic seats, cable management kits, power management modules, foot rests and under-desk treadmills for both expert advice and lab-tested product reviews of options in each of these categories.
Need more help? Read how to find your correct desk height, then check out 10 ways to improve your office ergonomics and answers to the most common standing desk questions.

0 Comments
Leave a response >