The Eureka Z60 Gaming Desk: Unboxing and Assembly
Like most reviews sites, our editorial staff and laboratory testing expenses are partially offset by earning small commissions (at no cost to you) when you purchase something through those links. Learn More

We’ve just finished assembling the Eureka Z60 Gaming Desk. While we’re testing it and getting our full review ready, here’s our experience getting the desk set up.
Unboxing the Eureka Z60 Gaming Desk
The box has a large illustration and the desk model “Z60” prominently printed on the top side. You won’t accidentally open the box upside down with clear markings like this. For a desk with such a long top, though, the box seems a little squat.
The box opens with a hinge flap, and there is a block of styrofoam greeting you. Everything is protected.
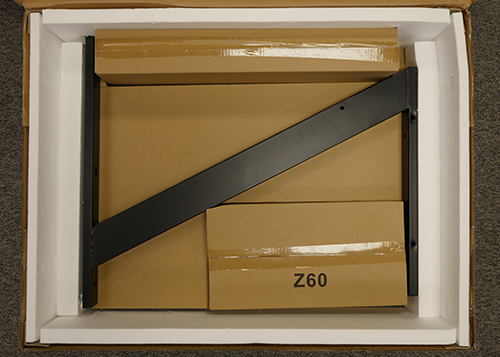
Moving the styrofoam out of the way, we see the decals and instruction manual sitting on top of part of the steel frame. That’s one half of the desktop base.
After moving that first layer of parts out of the box, we see the second half of the desktop base. How they managed to ship a 60″ desk in a 36″ box is becoming clear. Also note the long box of small parts, now clearly visible, at the top of the image.
Next, we reveal the desk’s legs, stacked on top of each other with a cardboard sheet separating them. Another box of small parts is nestled in the Z-shape of the legs.
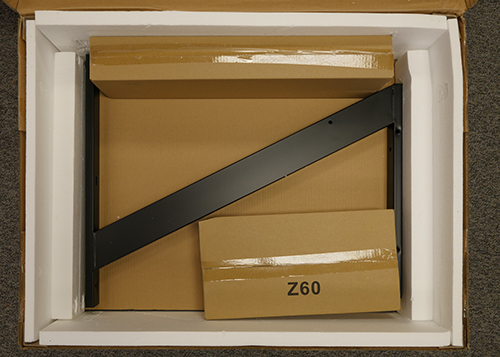
The shorter box is labeled “Z60,” and is heavier than the longer box. Let’s open it up.
The box is packed pretty densely with almost all of the desk’s hardware and small parts.
Here, we can see everything in the box laid out individually. From left to right, it contains the following:
- Top row—two large brackets (for the desktop base)
- Middle row—side armor corner pieces, four baggies of bolts and other hardware, and a Phillips-head screwdriver
- Bottom row—two small brackets (for the desktop), side armor pieces with the RGB LEDs lighting, and two leg braces
Among the bolts is an Allen wrench, like you would expect to find in any flat-packaged, assembly-required furniture. The screwdriver, however, was a nice touch. Its inclusion means that everything you need to assemble the Z60 Gaming Desk comes in the box. If you don’t have your own toolbox in the garage or a supply closet, that’s ok.
The red braces for the desk legs are labeled “R” and “L,” just like those of the smaller Z1-S Gaming Desk. (In this picture, the lighting makes the “R” hard to see, but the “L” is easily visible.) They look very similar, but they’re not actually interchangeable.
The longer box is unlabeled and lighter.
It contains the side armor pieces for the feet of the desk.
Next, we have the desktop. Or at least, half the desktop. The desktop is in two parts, which means two separate layers in the box. This design choice will mean extra steps in the assembly of the desk, and a permanent seam running down the middle of your desktop.
Here’s the other half of the desktop. On each side of the desktop, we can see grommet holes for cable management as well as the pre-drilled holes for attaching the side armor and LED lights. Many standing desks come with grommets for some added convenience. Check out our article on grommet holes, with everything you need to know about the different ways to use them to enhance your workstation, what to look for in your grommet holes, and where to find the desks with the best ones.
The last item in the box is the oversized mousepad, with a cool scorpion emblem.
Assembling the Eureka Z60 Gaming Desk
Assembling the Eureka Z60 Gaming Desk is a lengthy, but uncomplicated process. The instruction manual uses large, clear diagrams to illustrate each step, making it easy to follow.
Step One
To begin, the desktop base has to be assembled. The two halves are identical, which keeps things from getting too complicated. There are two small considerations, though. First, you’ll want to line up both pegs at the same time, for easy insertion. If one side goes in before the other, even by a small margin, it will jam and you won’t be able to line up the other peg correctly. Second, make sure that the bolt holes are facing up when you slide the two halves together.
Step Two
Now, for added strength, a pair of brackets is used to secure the two halves together. This step uses the larger set of black brackets, which have a U-shaped cross section. Four of the desk’s smallest bolts, labeled ③ in the instructions, are used to join each bracket to the desktop base.
Step Three
Bolting the legs to the top of the desk base is next. This desk uses the same leg configuration as its smaller “brother,” the Z1-S, so the procedure for this step and the next are the same as when we were working with that desk. Each leg uses two of the longest bolts, labeled ① in the instructions, and the bolt passes through the leg and into the desktop base.
Step Four
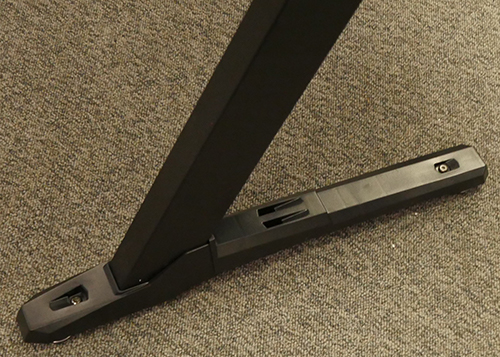
To ensure stability, the legs are braced at the corners. It’s time to add them on. We noted that the braces were labeled “R” and “L” for easy identification. Well, in the instructions, these parts are called P4 and P5, and when your desk is upside down, and you’re coming at it from all angles, it’s not immediately clear which side of the desk will be the right and which will be the left when it’s finally finished and upright. So, during assembly, we ignored the “R” and “L” imprints, and used the illustrations.
Once we determined which side each brace fit on, they went on quickly enough. Each brace required a ① bolt and a ③ bolt. We found it was easier to put the ③ in first, without tightening it all the way down, then to rotate the brace into place so that we could pass the ① through the desk leg and into the brace. Then tightening both bolts was easy. On the other hand, when we tried to do the ① first, lining up the ③ was awkward.
Step Five
The desk’s feet (⑤) go on next. This step was really simple. Note, however, that the feet have a plastic film protecting them. Remove the film before you screw the feet into the desk.
Step Six
Now that the base of the desk is fully assembled, you’ll be setting it aside for a moment. Get the two halves of the desktop out, and lay them, facedown, next to each other. You’ll also need the two smaller black brackets. Use four ③ bolts to attach the brackets to desktop, securing the two halves together.
Step Seven
Retrieve the desk base that you set aside after step five, and place it on top of the assembled desktop. Eight medium-length bolts, labeled ② in the instructions, are used to secure the desktop to the base.
Step Eight
At this point in the assembly, the desk is turned right-side up. No matter your strength or fitness level, you will likely want a second person to help you with this because the desk is large enough that it’s awkward (and potentially dangerous) to move by yourself.
The last of the short ③ bolts are used to attach the plastic “side armor” to the foot of the desk. With the base of the desk now complete, the rest of the steps center around finishing the top of the desk, which still looks a bit bare.
Step Nine
Now we swap the Allen wrench for the Phillips-head screwdriver. Each piece of the desktop side armor is secured to the desk with two small Phillips-head bolts, labeled ④. They’re impossible to mix up with the other bolts, having a slimmer profile and being silver colored, rather than the dark bronze of the ①, ②, and ③ bolts.
The corner pieces are quite simple to attach. They are identical, so it doesn’t matter which corner goes on which side. Just bolt them down.
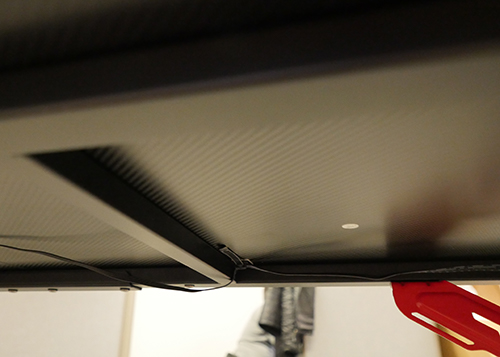
The side pieces are a bit trickier because of the wiring. There is a hole on each side of the desk for you to thread the LED lighting wires through. We found that the free end of the wire didn’t line up very well with the grommet hole at the side of the desk. You don’t the wire to get pinched or severed, so just be careful how you bend it to get it through the hole, and don’t let it slip while you screw the bolts in. You’ll probably want to do the left side (P12) first, as there is less wire to deal with there.
On the right side (P13), there are two bundles of wire attached to the light housing. The thin one is the wire that will reach across the underside of the desk and power the lights on the left side, the thick one ends in a USB connection meant to plug into your PC and power the lights. Rather than try to thread all those wires through the small hole, it’s easier to unplug the bulk of the wire from the right-side light housing, pass the wire lead through the hole, and reattach them.
Step Ten
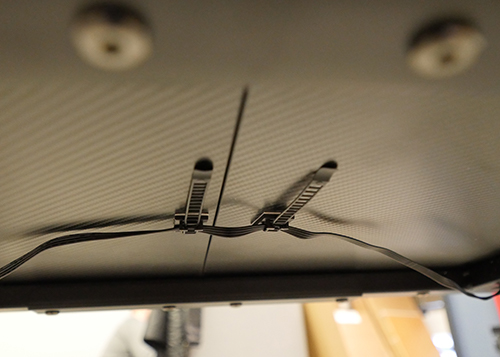
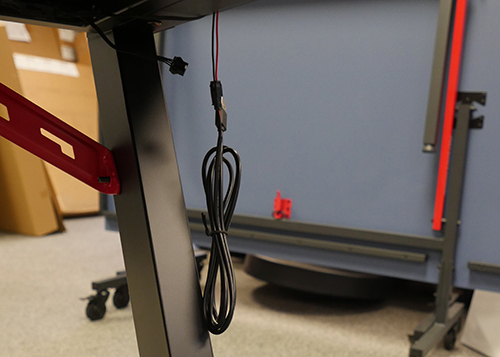
The next step has you dealing with this droopy length of wire, so it doesn’t get in the way while you’re at your desk.
There are four zip-ties included with the desk. They have a sticky pad that holds them to the underside of the desk, then you can use them to keep those wires snug against the desk, and out of your way. The lights get powered by the USB cord on the left side of the desk, which can be plugged into your PC.

Step Eleven
The last step when putting your Z60 Gaming Desk together is to put the gaming mousepad on the desk, and apply the decals to the legs. Be sure you put the correct decal on each side. The short taper goes towards the bottom of the desk leg and fits around the foot side armor, while the long taper fits around the bolt that holds the red brace to the leg.
This step also demonstrates how to choose the color of your desk’s LED lighting. The instructions are poorly translated from Chinese, but not impossible to understand. A long press turns the lights on and off, while a short press cycles through the desks color options. The instructions don’t tell you what those options are, but we’ll note them here:
- Blue
- Green
- Red
- Cyan
- Purple
- Yellow
- Color rotation (in the order above, for about 1 second each)
- Pulsing color rotation (same as above, but the colors start dim and grow to full brightness before cycling)
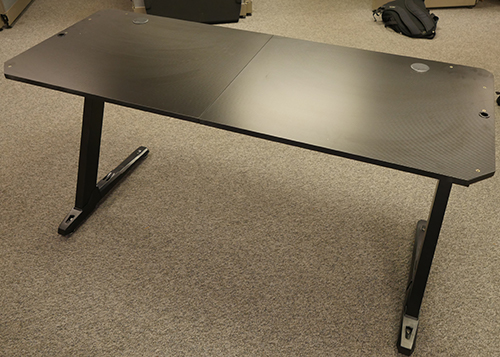
Now you’re ready to game with your Eureka Z60 Gaming Desk! For us, this assembly took just over an hour, but no part of the assembly was particularly difficult. The parts came together without problems, and the completed desk feels pretty solid, despite the seam in the middle of the desktop. Be sure to read our full review of the Z60 Gaming Desk, as well.
0 Comments
Leave a response >